
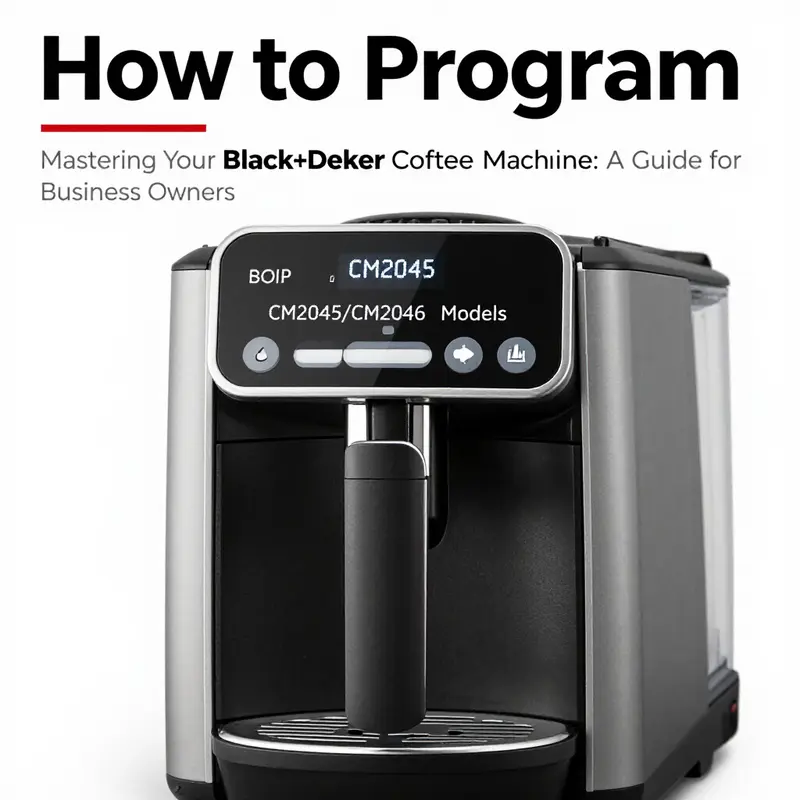
For business owners, ensuring a consistent and quality coffee service can significantly enhance customer experience. Programming your Black+Decker coffee machine allows for personalized brewing tailored to your business hours and clientele preferences. With models like CM2045/CM2046 focused on ease of use, and the BXCM0401IN that delivers espresso perfection, this guide will walk you through everything from model identification to troubleshooting common issues. Each chapter builds insight towards preparing your machine for optimal functioning, enhancing your coffee offerings in a competitive market.
Finding the Right Model and Programming Path: A Cohesive Guide to the Black+Decker Programmable Coffee Maker

A reliable morning begins with a consistent ritual: coffee at the moment you want it. A Black+Decker programmable coffee maker can be the quiet engine behind that ritual. The first step is identifying your exact model so you can reference the correct manual. Look for a model number on a label at the back, bottom, or side of the unit, and confirm you are dealing with a model that supports clock setting and auto brew. Once you have the right model, the steps become straightforward: set the clock, program the auto-brew time, and know how to cancel a scheduled brew. The control panel usually uses a few common buttons such as Clock, Program, Start, and Cancel or Stop. To set the clock you press and hold Clock until the display flashes, then use the Hour and Minute controls to match the current time. Release Clock to save the setting. To program auto-brew, press Program, set the desired start time with Hour and Minute, and the machine will begin the brew at that time. If plans change, re-enter Programming and use Cancel to clear the scheduled time. Some models include a thermal carafe option; in that case the brew is ready to pour and the carafe keeps the coffee hot. Others may offer espresso-like settings or steam features; follow the model’s specific guidance for those functions while staying within supported options. For further accuracy, consult the model specific manual available on the brand’s support site, or check the packaging or quick start guide for the exact button labels and sequence. With a bit of familiarization, programming becomes a reliable morning rhythm rather than a mystery, turning wake-up time into a smooth, hands-off routine. External resources can provide model families and PDFs that map features to button layouts, helping you identify which models rely on simple clock programming and which offer more beverage options.
Waking Up to Convenience: Mastering the Programming of a Programmable Black and Decker Coffee Maker
The morning ritual of coffee can be a reliable rhythm if the machine behind it is trustworthy and predictable. A programmable coffee maker promises that first fragrant pour even when the house is still quiet, and the steps to bring that promise to life are simple enough for a beginner and thoughtful enough for a routine user. The general approach hinges on two core actions: telling the machine what time it is and telling it when to begin brewing. While the exact buttons and labels vary by model, the logic remains the same. In many 12-cup programmable, thermal-carafe designs, the path is to set the clock so the machine knows the current time, then schedule an auto-brew for the hour you want to wake up to coffee. From there, you manage the carafe and the brew process to ensure warmth and flavor stay aligned with your morning needs. The beauty of this setup is that once you dial in your preferred wake-up brew, you can rely on consistency day after day, without standing over the kettle each morning. To anchor this, imagine a straightforward routine that begins with proper preparation, moves through time setting and auto-brew programming, and ends with a reminder about care and safety so the machine keeps delivering comfort for years to come. For those curious about deeper brand-specific context, a broader guide to Black Decker coffee makers provides a useful overview, and it’s worth consulting that resource as you refine your own routine. See Black Decker coffee makers: the complete guide for broader background and model-agnostic tips.
Before you power up the program, assemble a small, practical setup. Make sure the machine is unplugged, the carafe is in its place, and the water reservoir is filled with fresh, cold water. A practical rule of thumb is to use about one tablespoon of ground coffee for each cup of water you plan to brew. This ratio isn’t a sacred law, but it tends to yield a balanced cup without bitterness or weak extraction. If you’re switching between tones of roast or grind, you may adjust by a spoon or two, tasting and refining as you go. Ground coffee should be fresh and stored properly to preserve aroma, but once in the basket, it should remain undisturbed until the brew begins. With the reservoir filled and the grounds in place, you’re ready to engage the clock and the auto-brew sequence that will carry you toward that first, inviting sip of the day.
The clock setting is the gateway to automation. Most machines provide a time-related control that you hold or press to begin flashing the current hour and minute. The exact labels may read Time, Clock, or a similar designation, but the action is the same: you illuminate the display to accept new values, then use the hour and minute controls to set the precise moment when the brew should start. Once you’ve finished adjusting, you confirm the setting with a dedicated confirmation button such as Start or Clock. The crucial point is to align the machine’s internal clock with the actual time, because the auto-brew will run precisely at the moment you’ve programmed. If the clock is off, even by a small margin, the brew could begin too early or too late, potentially wasting coffee or leaving your kitchen in disarray as you scramble to catch the wake-up call.
After the clock is correctly set, the next step is to program the auto-brew time itself. Enter the programming mode and select the hour and minute you want the brewing cycle to commence. For a common morning routine, you might choose a wake-up time like seven o’clock so the coffee finishes just as you rise. When you save this scheduled time, the machine will automatically begin the brewing cycle at that moment, warming the carafe as needed to maintain warmth after the pour. In many models, the process is a simple sequence: enter Program, adjust the time with the hour and minute controls, then confirm or save with a Start or similar button. If at any point you need to cancel a scheduled brew, you re-enter the programming mode and clear the timed setting. This flexibility helps you accommodate changes in your routine without needing to unplug or reset the entire device. The result is a reliable, hands-free routine that preserves the aroma and flavor you rely on to start the day.
The presence of a thermal carafe adds an additional layer of practical warmth to the routine. A dedicated feature of these machines is that the carafe’s insulated design helps sustain temperature after brewing, so coffee remains pleasant for a longer stretch. When you wake and pour, the cup should still radiate warmth without a noticeable drop in flavor. This aspect means you can plan a longer, leisurely morning without sacrificing the first cup’s profile. If your model offers a Brew button that initiates the cycle, simply press it after the carafe is in place and the water is filled. The thermal design then takes over, keeping the coffee ready while you attend to other morning tasks.
For those who enjoy more than plain drip coffee, some machines in the same family line accommodate beverages beyond a standard brew. A four-cup espresso and cappuccino machine, for instance, centers its programming around function selection rather than scheduling. In such models, you choose between Espresso, Cappuccino, or Steam, and you may have options to adjust strength or shot count. A feature-rich variation can also include automatic steam frothing for milk, streamlining cappuccino prep. If you happen to own a device of this type, the emphasis shifts from time-based automation to the precision of your chosen beverage and the way you tailor settings to your taste. Regardless of the exact feature set, the core idea remains: understand the interface, select the desired option, and adjust to your preference.
Beyond the moment-to-moment setup, care, and routine maintenance play a key role in keeping programmable machines reliable. Regular cleaning of the brew basket, carafe, and water reservoir helps prevent oil buildup and stale flavors from seeping into your coffee. Use fresh water for each brew, and consider a periodic descaling regimen if your water is hard. A quick check of seals and gaskets ensures there are no drips or leaks, and a brief wipe-down of the exterior maintains the unit’s appearance and safety. When you finish a cycle, allow the machine to cool before reloading or storing, and never operate the appliance with the lid or basket missing. These small habits accumulate into consistent performance and longer life for the machine.
In practice, the sequence often looks like this: prepare the machine, fill the reservoir to your planned level, load the coffee grounds, set the clock, program the auto-brew time, and confirm the settings. If needed, cancel a scheduled brew by re-entering the programming mode and clearing the timed instruction. Then, when the time arrives, the machine will wake up and begin brewing, filling the kitchen with aroma and giving you a reliable morning anchor. If you want a broader context on brand-specific models and more nuanced use cases, consult the wider guide on Black Decker coffee makers for deeper insights and variations across different products. For precise, model-specific instructions, consult the official manual and related resources linked by the manufacturer. This approach ensures you have the most accurate, safe, and up-to-date guidance as you tailor the programming to your routine.
For readers who want an action-oriented reference within a broader ecosystem of coffee content, consider exploring a comprehensive resource that covers practical routines and flavor-focused tips. You can find a detailed exploration of brand ecosystems and user experiences that complements this chapter here. And for a direct dive into the official documentation, the dedicated manual page provides the definitive steps and safety information you’ll rely on as you adjust programming, operating habits, and maintenance schedules.
In sum, programming a programmable coffee maker—whether a straightforward 12-cup model with a thermal carafe or a more feature-rich espresso-capable unit—centers on three simple acts: accurate timekeeping, precise scheduling of the auto-brew, and mindful care that preserves flavor and warmth. With a little practice, your mornings become a steady rhythm rather than a rushed improvisation. Your coffee will be ready when you expect it, your kitchen will stay comfortable and calm, and the small routine will quietly support a smoother start to the day. For a consolidated reference on related models and broader brand context, see Black Decker coffee makers: the complete guide.
External resource for model-specific details: https://www.blackanddecker.com/support/manuals/CM2046
The Limits and Practical Wisdom of a Simple Drip Brewer: Understanding the Programming Boundaries of a Compact Black+Decker Model

When readers imagine a programmable coffee maker, they often picture a device with a clock, a lighted display, and the promise of coffee ready exactly at dawn. Yet not every brewer carries that level of scheduling sophistication. In the realm of compact, four-cup drip machines, a certain unpretentious model stands out for its straightforward operation and a design that favors reliability over bells and whistles. This chapter looks at that no-frills approach, explains what can and cannot be programmed, and offers a practical lens on how to get the most from a machine whose strength lies in simplicity rather than customization.
First, it helps to set expectations about what this particular unit is designed to do. It is a compact, drip-style coffee maker that emphasizes a direct, on-demand brew cycle rather than a timed, automatic wake-up call. The control interface is lean: an on/off switch and a basic brew mechanism. There is no built-in digital timer, no clock that can be set to start brewing at a specific moment, and no programmable brew time. In other words, if your goal is to program a coffee maker to begin brewing at 6:15 a.m. every weekday, this model will not fulfill that requirement on its own. The absence of a programmable start time is not a flaw; it reflects a deliberate design choice that prioritizes simplicity, fewer potential failure points, and ease of use for those who prefer a straightforward cup every morning without delay.
Even without a timer, the machine still supports a dependable brewing process. You pour water into the reservoir, add coffee grounds to the filter area, and press the Brew button to initiate the cycle. The action is immediate and predictable: the water heats, travels through the grounds, and drips into the carafe. The ergonomic and intuitive nature of this interaction is a real advantage for busy mornings when you want to rely on muscle memory rather than a manual of settings. The lack of advanced programming means fewer menus to navigate and fewer chances for a misconfigured brew. For many users, this predictability is precisely what makes a simple machine appealing: you know what you’re getting, every time.
A defining feature that aligns with its no-frills philosophy is the permanent steel mesh filter. This design choice eliminates the recurring need for disposable paper filters and contributes to the model’s eco-friendly appeal. It also simplifies maintenance: there are fewer components to misplace, replace, or malfunction. The trade-off, of course, is that the filter requires careful rinsing to prevent coffee oils from building up and imparting off flavors over time. Because the mesh is sturdy, it should withstand regular cleaning with a gentle scrub and a thorough rinse. This approach to filtration also subtly influences how you manage your brew strength. With a reusable filter, the maximum flavor is often achieved by finer-grind coffee and a slightly adjusted coffee-to-water ratio. Without a programmable feature to tweak the brew parameter precisely, those small, manual adjustments become the practical levers you rely on.
In the absence of digital programmability, the practical path to a consistent cup is to standardize the variables you can control without a timer. Start with a measured coffee-to-water ratio and a repeatable grind size appropriate for drip extraction. Because the unit lacks adjustable brew strength or size settings, your brew results hinge on how consistently you dose the coffee and how closely you match the water volume to the carafe capacity. If you find the brew too weak, try using a slightly finer grind or a touch more coffee by weight. If it’s overly strong, dial back the coffee amount or opt for a slightly coarser grind. These adjustments do not require any electronic configuration; they are traditional, tactile tweaks that seasoned home baristas frequently employ when a machine’s programming options are limited.
Another notable aspect is the ritual of operation itself. With a simple, predictable sequence—fill, add grounds, initiate the cycle—the routine becomes almost meditative. There’s a quiet efficiency to a device that offers little to think about beyond the basics. This simplicity also translates into fewer potential failure points. Fewer electronic components mean fewer opportunities for a display to fail or a timer to misbehave. For households where a complex control panel could cause confusion or a fear of breaking the morning rhythm, the straightforward workflow is a bonus rather than a drawback.
From a maintenance perspective, the absence of advanced programmable features makes cleaning and upkeep straightforward. Regular rinsing of the water reservoir, the filter area, and the carafe is sufficient to keep flavors clean and consistent. While the lack of a keep-warm function or programmable auto-shutoff can be seen as a missed convenience, it also means less energy consumption and fewer variables that can degrade over time. If you do rely on the appliance’s one-button start, you’ll appreciate how little there is to troubleshoot when a brew doesn’t quite meet expectations. In that moment, the remedy is immediate and tangible: adjust the coffee-to-water ratio or try a fresh batch with clean filters, and you’re back on track.
For those who crave a schedule or want the convenience of automation, the practical workaround is to integrate an external timing solution. A smart plug or a simple mechanical timer placed in the power path can offer a controlled start without altering the machine’s internal mechanics. This approach, while introducing an external element, preserves the machine’s core identity: a compact, dependable brewer that delivers a solid cup when you actively engage it. The external timer technique keeps the routine flexible and allows you to retain the purity of a non-programmable experience while adding a touch of predictability to align with your morning schedule. It’s a compromise that fits well with the machine’s design ethos and with a reader’s desire for reliable, repeatable results.
A final consideration is the broader context of choosing between programmability and simplicity. In a market glutted with devices that boast timer presets, auto-brew features, and adjustable strengths, this model offers a counterpoint: fewer features often equal fewer distractions and more dependability. If your life requires a device that behaves the same way every day, with minimal setup and minimal maintenance, its value becomes clear. Conversely, if your routine hinges on a brew that starts before you wake, or if you want to tailor a cup to taste at the touch of a button, you’ll want to explore models that incorporate programmable clocks, multiple brew sizes, and customizable strength settings. In that sense, the model serves as a reminder that the best coffee experience is not always the most feature-rich machine; sometimes it’s the most consistent, easiest to operate option that reduces morning friction.
For readers who want to explore a broader spectrum of Black+Decker offerings and understand how this simple unit compares with its more feature-rich siblings, there is a thorough guide that navigates the landscape of Black+Decker coffee makers. It provides a clear contrast between devices that embrace automation and those that embrace manual control, helping you choose the right tool for your rhythm. (Internal reference: Black Decker coffee makers—the complete guide.)
In sum, the BXCM0401IN-class machine embodies a philosophy of straightforward brewing. It does not pretend to be more than it is: a compact, no-fuss drip brewer that emphasizes a clean filter, simple operation, and reliable performance. Its lack of programmable features is not a shortcoming but a deliberate design choice that suits homes and offices where minimal setup and predictable results trump a calendar of wake-up times or a menu of customizable options. If that aligns with your coffee ritual, you’ll likely enjoy the quiet confidence of a device that starts with a switch and ends with a steady, dependable cup. And if you ever crave a teachable moment about programmable coffee making, you can always look beyond this model to explore machines that bring clock-based automation into daily practice. In the end, the right tool is the one that fits your mornings—the morning that begins not with a device’s schedule, but with a cup that tastes right because you kept the variables manageable and the routine human.
External resource: https://www.blackanddecker.com/products/coffee-makers/bxcm0401in
null
null
Mastering the Clock: Programming and Troubleshooting a Programmable Home Coffee Maker

The morning ritual of coffee often hinges on a simple, quiet promise: the machine will wake, brew, and pour without demanding our attention. When a programmable coffee maker falters, that promise feels fragile. The fix isn’t simply about pressing buttons in the right order; it’s about understanding how time, water, heat, and grounds converge to launch a reliable brew. This chapter approaches programming and troubleshooting as a single, cohesive practice rather than a sequence of isolated tasks. It treats the clock as the heart of automation and treats every hiccup as a signal to slow down, check the basics, and reassert the machine’s alignment with your routine. In doing so, the process becomes less a frustration and more a small, repeatable system you can trust from weekday mornings to lazy weekend Brunch Sundays.
Most programmable models in this family share a familiar layout: a clock display, a Programm or Program button, a Start or Brew control, and a set of hour and minute adjustments. The exact labels may vary, but the logic holds. You set the clock once, you program an auto-brew time, and you expect the machine to initiate the cycle when that time arrives. When it doesn’t, the cause is rarely dramatic. More often, it’s a couple of basic misalignments: the clock isn’t actually showing the current time, the timer isn’t enabled, or something in the brew path is asking for attention before the machine can complete its scheduled act. The good news is that most fixes are straightforward and repeatable, designed to restore confidence rather than require a full reset of your kitchen routine.
First, confirm the most basic requirement: power. A programmable brewer won’t respond if it isn’t receiving power, even if other indicators appear on the display. Check that the unit is firmly plugged into a functioning outlet. If the outlet is shared with a switch or a surge protector, test by plugging the machine directly into a known-good outlet for a moment. If the display flickers or remains dark, test another device in the same outlet to verify the circuit before proceeding. If power is present but the control panel remains nonresponsive, a reset often resolves the issue. The reset steps are not universal across all models, but a common approach is to unplug the unit, wait for a full minute to allow internal capacitors to discharge, and then plug it back in. In many cases, the machine will power up with a fresh start, and you can begin the clock and program sequence anew.
With power confirmed, the clock becomes the focal point. The misalignment of actual time and programmed time is a frequent source of missed brews. To set the time, locate the Clock control—often labeled Clock or marked with a clock icon. Press and hold the Clock button until the display begins to flash. Use the Hour and Minute adjustments to reflect the current time, paying attention to AM/PM if your display uses a 12-hour format. Release the Clock button to save the new time. If the model uses separate Plus and Minus controls, use them to adjust hours and minutes precisely, then confirm with a secondary press of Clock or a dedicated Save option. If the display shows the wrong digits after saving, repeat the steps to ensure there isn’t a misread of the intended hour or minute. A correct clock is not just cosmetic; it anchors the auto-brew feature to the exact moment you expect.
Next comes setting the auto-brew. This is where the integration of timing and function becomes tangible. Press the Program button to enter the scheduling mode. Use the Hour and Minute controls to select the precise time you want coffee to start, for example 7:00 AM. In many models, the machine will indicate that the timer is active with a small icon or a blinking display. Some machines require you to confirm the programmed time by pressing the Program button again or by pressing Start to lock in the setting. If the clock and the program appear aligned but no brew occurs at the scheduled moment, re-check that the timer is indeed enabled and that the display confirms the programmed time rather than the current time. It’s easy to forget a step that seems obvious, especially on a busy morning.
The physical setup of the brew is another layer that can derail a scheduled cycle. Ensure the water reservoir is filled to the recommended level. A low water level will typically prevent brewing or trigger a message on the display. The filter basket should be loaded with fresh grounds and seated correctly. A misaligned or loose basket not only yields weak coffee but can also trigger the machine’s safety features, halting the cycle mid-brew. Place the carafe under the dispenser in the correct position; a misaligned carafe can prevent the brew from pouring or trigger optimistic alarms about spillage. When everything sits in its proper place, the machine is free to execute sequencing without impediments.
If the machine still refuses to begin at the scheduled time, look for indicators of maintenance needs. Some models show a flashing light or a flashing specific icon to signal that descaling or other maintenance is due. Descaling, in particular, is a common recurring maintenance task for any home brewer. A regular descaling cycle cleans mineral buildup that can affect heater efficiency, water flow, and even the timing electronics that trigger the brew cycle. The descaling process typically involves running a solution of water and a mild descaling agent through one or more complete cycles, followed by several flush cycles with clean water to remove residues. Regular cleaning of the drip tray, the carafe, and accessible internal surfaces minimizes the chance of blockages that can interfere with the brew itself.
Troubleshooting moves from macro to micro as you narrow down the cause. If the machine powers up but the display remains stubbornly quiet or the clock refuses to update, recheck the power connection and inspect the user interface for stuck or sticky buttons. A common yet overlooked cause is a physically obstructed input—coffee grounds or moisture under a button can mimic a pressed state or prevent a button from registering a command. A gentle, deliberate cleaning with a dry cloth around the control panel can restore proper contact, but avoid using liquids near electrical contacts. If the program mode is active but the machine won’t start the brew, confirm that the carafe is in place and that the brew path is clear. A tiny misalignment can confuse the flow sensor, which in turn halts the cycle for safety.
Even when all mechanical checks pass, there can be a mismatch between intention and outcome if the user’s expectation isn’t aligned with the machine’s design. Some programs will not initiate unless the clock is set to a time in the future or unless the current time matches the programming window precisely. If you’ve set a time but forget to save after adjusting, the machine will retain the old settings and continue to rely on outdated timing. Patience matters here: after a reset and a fresh set of steps, wait for the display to reflect the updated clock and program settings. A single missed step—like a forgotten save or a stray AM/PM misread—can cascade into an entire morning routine misfire. The habit of rechecking the basics—power, clock, program, and placement—becomes the most reliable workflow.
The conversation around programming is not only about how to trigger the brew at a specific moment. It’s also about building a predictable sequence that honors your preferences. For example, some mornings call for a gentler pre-warm or a stronger cup later in the day. If your model offers strength control or a single versus double shot option, consider how these choices intersect with your timing. A clock-driven auto-brew can accommodate a early-morning strong coffee and a later, lighter cup if you adjust the cycle in small, deliberate increments ahead of time. The key is to treat each adjustment as part of a single, well-practiced routine rather than as isolated modifications you make only when things go wrong.
Finally, when the clock, the program, and the brew path all align, remember that even the best automation benefits from a periodic tune-up. Regular cleaning, routine descaling, and occasional checks on the filter basket and carafe gasket preserve the integrity of the brew and the reliability of the schedule. If you find yourself revisiting the same issues week after week, it may be time to consult the model’s official manual for model-specific steps or to consider a service check. The manuals are written with the subtle knowledge that real kitchens present diverse water qualities, varied power outlets, and different usage patterns. They can offer precise button combinations, reset sequences, and the exact prompts you’ll encounter on your display. In practice, the most dependable path through programming and troubleshooting is a calm, methodical approach: verify power, confirm the clock, lock in the program, prepare the brew pathway, and maintain the machine with routine care.
For precise, model-specific steps and troubleshooting details, you can consult the official manual and support resources. These sources provide the up-to-date guidance that reflects the latest designs and safety recommendations, helping you keep your programmable brewer operating smoothly. If you’d like a broader overview of common approaches to maintaining and using programmable home brewers, you can explore related guidance in reliable, brand-referenced resources that discuss the complete lifecycle of a kitchen appliance—from setup to descaling to replacement parts. External resource: https://www.blackanddecker.com/support
Final thoughts
Successfully programming your Black+Decker coffee machine can improve your coffee preparation efficiency and consistency, helping to enhance customer satisfaction. The various models serve different purposes, catering to a range of coffee needs from brewed coffee to espresso-based drinks. Armed with the information detailed in this guide, you should feel confident in configuring your equipment to meet your business’s demands. Regular reference to official manuals and troubleshooting guides will ensure that your coffee service remains smooth and efficient.